Mailserver name: echo constant('MAIL_SERVER');
Instructions for getting Mail from TheEldestGeek or TopTech hosted websites:
WEBBASED – Roundcube:
go to https://www.yourwebsite.com/webmail
Enter your FULL email address as your username, including your domain.
Example: cdb@theeldestgeek.com
Enter your password.
Enjoy!
CLIENT BASED: Select THIS information for any client:
| Incoming Mail Server | ns10.cdbsystems.com |
| Outgoing Mail Server (SMTP) | ns10.cdbsystems.com |
| Incoming Port (IMAP) | 143 (993 if encrypted, pick SSL/TLS) |
| Outgoing Port (SMTP) | 25 (if encrypted pick: 587 STARTTLS or 465 if SSL/TLS) |
| Username | Your full email address |
| Password | Your password |
| Select: My Server requires authentication | |
OUTLOOK:
There are various outlook versions but generally –
- Open Outlook and select File > Add Account.
- On the next screen, enter your email address, select Advanced options, then check the box for Let me set up my account manually and select Connect.
- Select your account type – pick IMAP.
- Incoming mail Server: ns10.cdbsystems.com
Port 143 (if no encryption) or Port 993 (SSL/TLS) - Outgoing mail server: ns10.cdbsystems.com
Port 25 (if no encryption) Port 465 (SSL/TLS) or Port 587 (STARTTLS) encryption - Make sure (under advanced) that ‘My server requires authentication’ is checked!
IPHONE:
- Go to Settings > Passwords & Accounts tap Add Acount.
- Tap Other, than type Add Mail Account
- Enter your name, email address, password, and a description
- Tap Next. We need to enter them manually:
- Chose IMAP for the new account.
- INCOMING MAIL SERVER – Host name: ns10.cdbsystems.com
- Username your FULL email address (eg cdb@theeldestgeek.com)
- Your password
- Tap Next.
- OUTGOING MAIL SERVER – Host name ns10.cdbsystems.com
ANDROID DEVICE:
To add your hosted email address to your Android device please follow these steps:
- Open the Menu, then select System Settings. Select Accounts, then Add Account.
- Enter your email address next to the username, followed by the password for your email address.
- Select IMAP.
- Enter your email address next to the username again, followed by the password for your email address. Enter the server ns10.cdbsystems.com followed by the port number (IMAP uses 143 if Security Type is None, 993 if Security Type is SSL/TLS). Click Next.
- For the SMTP Outgoing mail server enter ns10.cdbsystems.com followed by the port number (25 if No security, 587 for STARTTLS or 465 for SSL/TLS).
- Check the box next to Require Sign-In. Enter your email address next to the username followed by the password for your email address.
- Click Next.
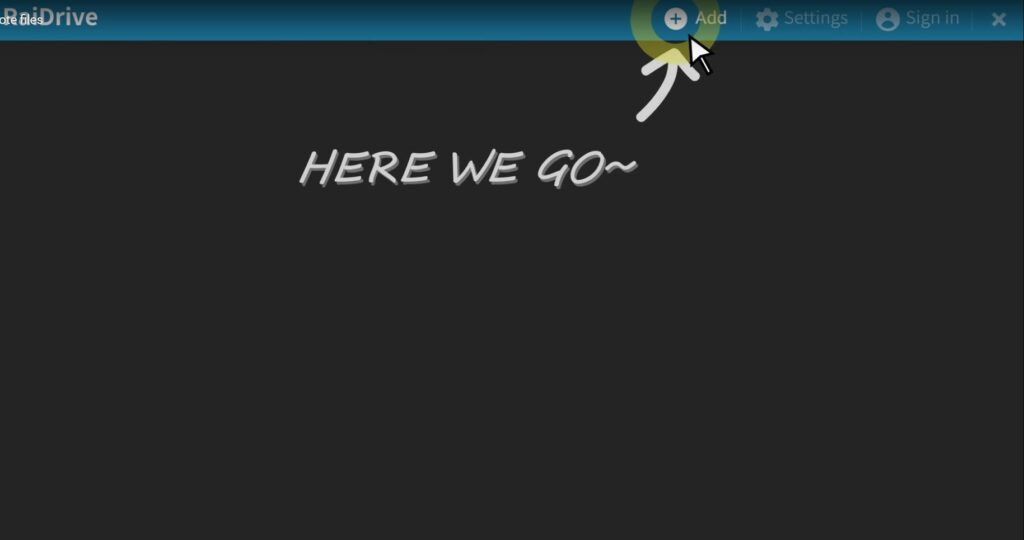
If you are accessing NEXTCLOUD with RAIDRIVE (a great free utility) then after installing RAIDRIVE You will see a screen like this with the HERE WE GO. This means RAIDRIVE does not know what to connect to! we have to ADD a connection to the nextcloud server.

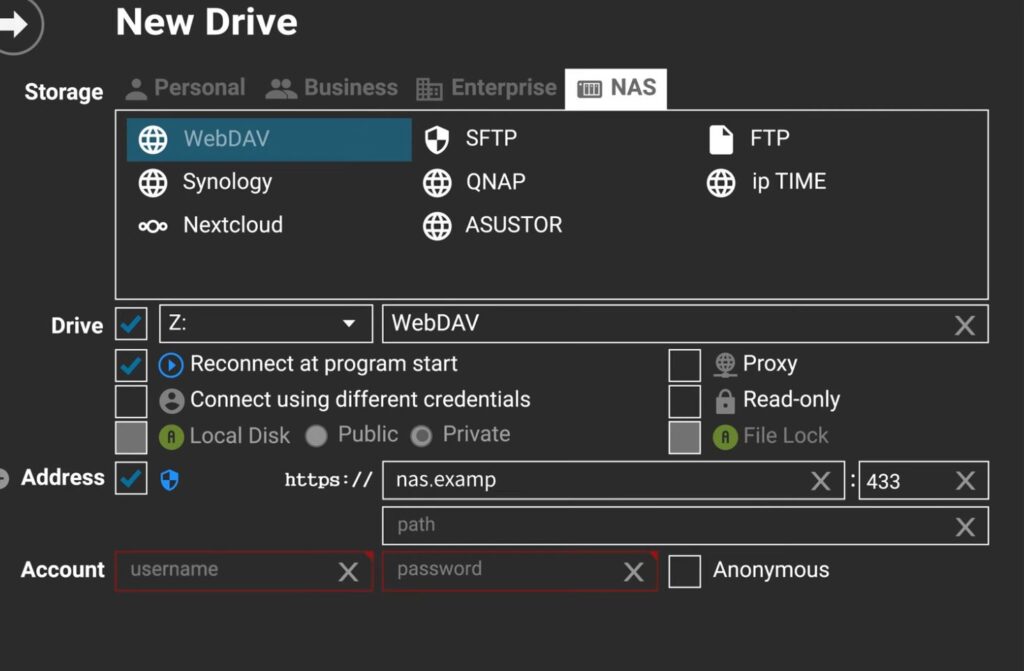
Now after clicking on HER WE GO you see:

In the above window which we get after clicking NAS (top line) and WebDav (next line) you see the boxes with Drive etc.
Pull down Z and pick drive R (or whatever you wish). Check the box ‘Connect using different credentials and the box Reconnect above it.
In the https line enter (exactly) nextcloud.qhscares.com (for QHS customers). And for the path enter: /remote.php/webdav
